
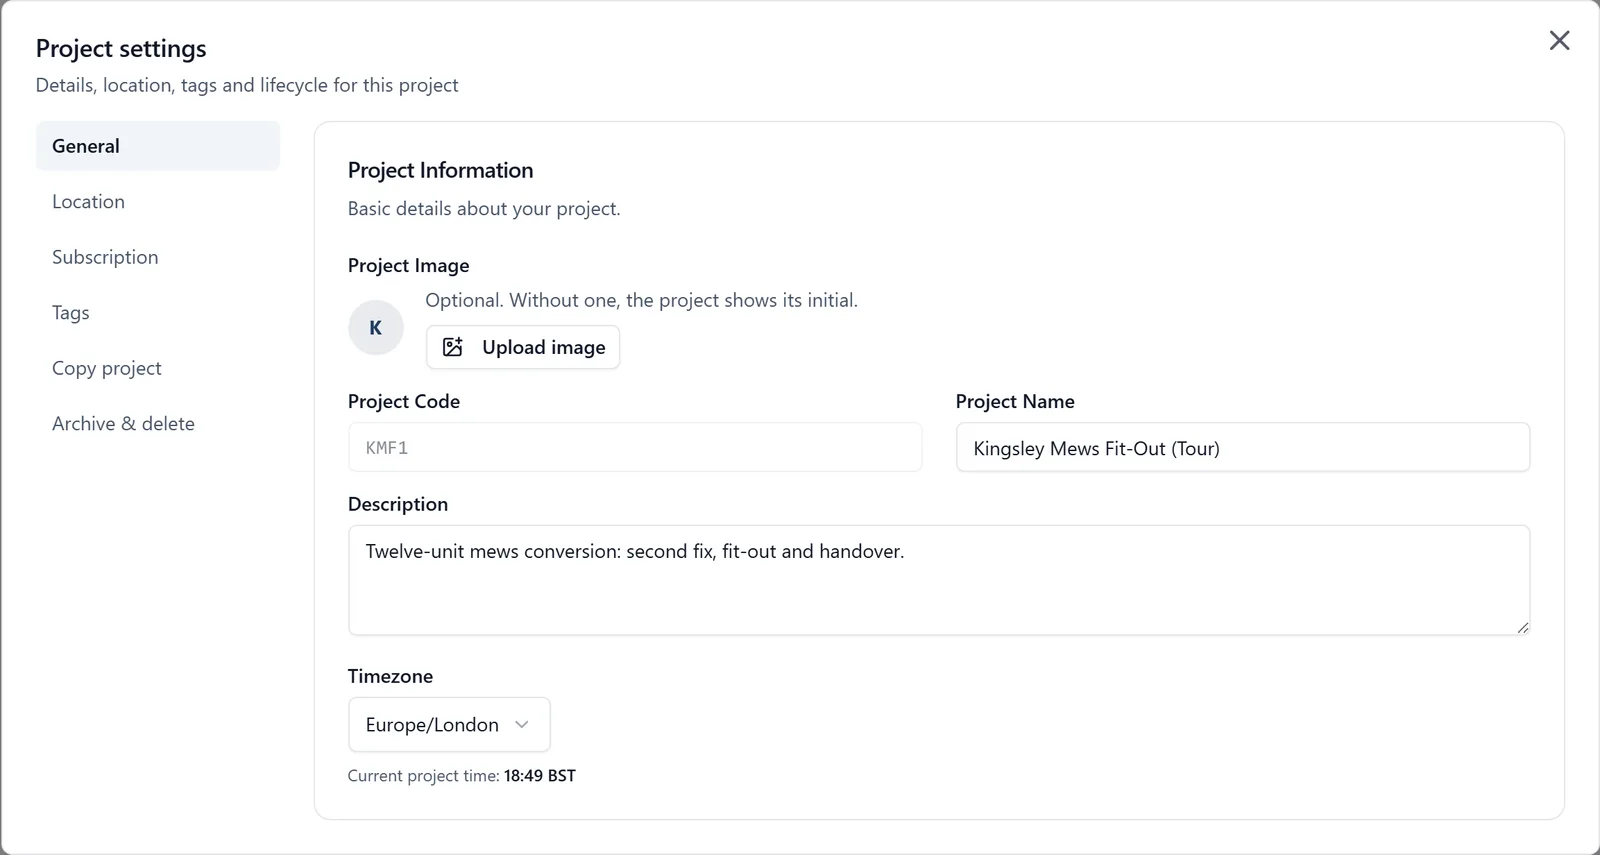
If you are a project admin, you can change project details and manage settings.
How to get to Project Settings:
- Tap the three-line icon (☰) in the top-left corner to open the side menu
- Tap “Project Settings”
- (If you don’t see this option, you are not an admin on this project)
What you can change:
- Project name: The name shown at the top of the app
- Project description: A brief summary of the project
- Timezone: The timezone used for all dates and times shown across the app. Admins can tap the Timezone field and pick the correct zone (e.g., “Europe/London”). This keeps everyone on the same time even if team members are in different regions.
- Working day: How many hours a whole day is worth on this site (8 by default). Used when the delay register converts a full day lost into hours. See the “delay_register” topic.
- Working week: Which weekdays the site usually works (Monday to Friday by default). Weekends and any Extra days off you add (bank holidays, shutdowns) are shaded on the programme and skipped when the site diary asks whether the site was closed. Dragging a task on the programme still moves calendar days, including days off.
- Project address: This is used for weather forecasts and to put the site’s pin on the map, so make sure it’s correct. When you create a project, the app says where it placed the pin, or why it placed none (an address it could not find, or one that matches more than one place). Move the pin on the map if it landed in the wrong spot
- Site radius: how close to the pin counts as on site, from 50 to 500 metres. A check-in made clearly further out is flagged as away from the site. Setting it checks nobody in by itself, and it does not replace people checking in: see the “site_attendance” topic
- Check-out cut-off: how long somebody can stay checked in on this site before it is treated as a forgotten check-out: 8, 10, 12, 14 or 16 hours, and 12 unless you change it. After that they stop showing as on site, the check-in counts no time, and it joins the records an admin is asked to put right. Choose something longer than the longest ordinary day on the site. It is under Location in a browser, and below the site radius on the phone. A day with both a check-in and a check-out is never changed by it, so changing the cut-off does not alter hours already recorded: see the “timesheet_corrections” topic
Site poster (admins, in a browser): A printed QR code for the gate or the cabin. The crew scan it with their phone camera to check in, new starters can ask to join, and visitors can sign themselves in and out (see the “site_attendance”, “team_management” and “visitor_register” topics).
- Open Project Settings and choose Site poster, then click Print a poster
- Say where it goes (for example “Main gate”), and choose whether new starters may ask to join from it
- Tick Let visitors sign in if visitors should sign themselves in from it. Write what they need to know, tick the PPE they must wear, and choose who is told when one signs in. The company needs a privacy contact first, which an owner or administrator can add there and then
- Click Create poster, then Print. Print every copy you need there and then: the code is kept only on the paper, so once the window closes the same poster cannot be printed again, and you print a new one instead
- Copy link gives you the poster’s address to share, for example in the crew’s WhatsApp group
A poster works until you Withdraw it from the same section. Withdrawing stops anybody new using it; your own crew can still check in with it, and a visitor it signed in can still sign out. What a poster says, including its note for visitors, cannot be changed after printing: print a new one instead. The phone app does not print posters.
Managing your team:
- Invite new members, change roles, or remove people from the project
- See “Team & People” guide for step-by-step instructions
Subscription & billing:
- Your plan sets how many people you can have:
- Free: up to 5
- Trial: up to 10
- Starter: up to 10
- Professional: up to 50
- Business: up to 100
- Enterprise: more than 100, arranged with us
- There is no Manage Billing button in the app. To change your plan or your billing details, email support@buildersai.co.uk, or ask your organisation owner or admin. See the “organisation_and_seats” topic for how seats work
Deleting a project (admins only):
- In Project Settings, scroll all the way to the bottom. You’ll find a “Danger Zone” card titled “Delete Project”
- Tap Delete Project and confirm in the dialog
- The project enters a 7-day grace period: a banner appears on the project dashboard counting down the days remaining
- Any project admin can cancel by tapping “Cancel Deletion” on the banner or in Project Settings
- After 7 days, the project, all photos, plans, files, work items, member associations, and check-in history are permanently deleted and cannot be recovered
This works the same way on mobile and web.
Your personal profile and app settings: If you want to change your own details (not the project), go to:
- Side menu (☰) → “Profile”: Update your name, email, phone number, certifications, and notification preferences
- Side menu (☰) → “App Settings”: Manage site check-in, privacy, and offline files
Note: Only admins see “Project Settings” in the side menu. If you’re a member or follower and need something changed, ask your project admin.