
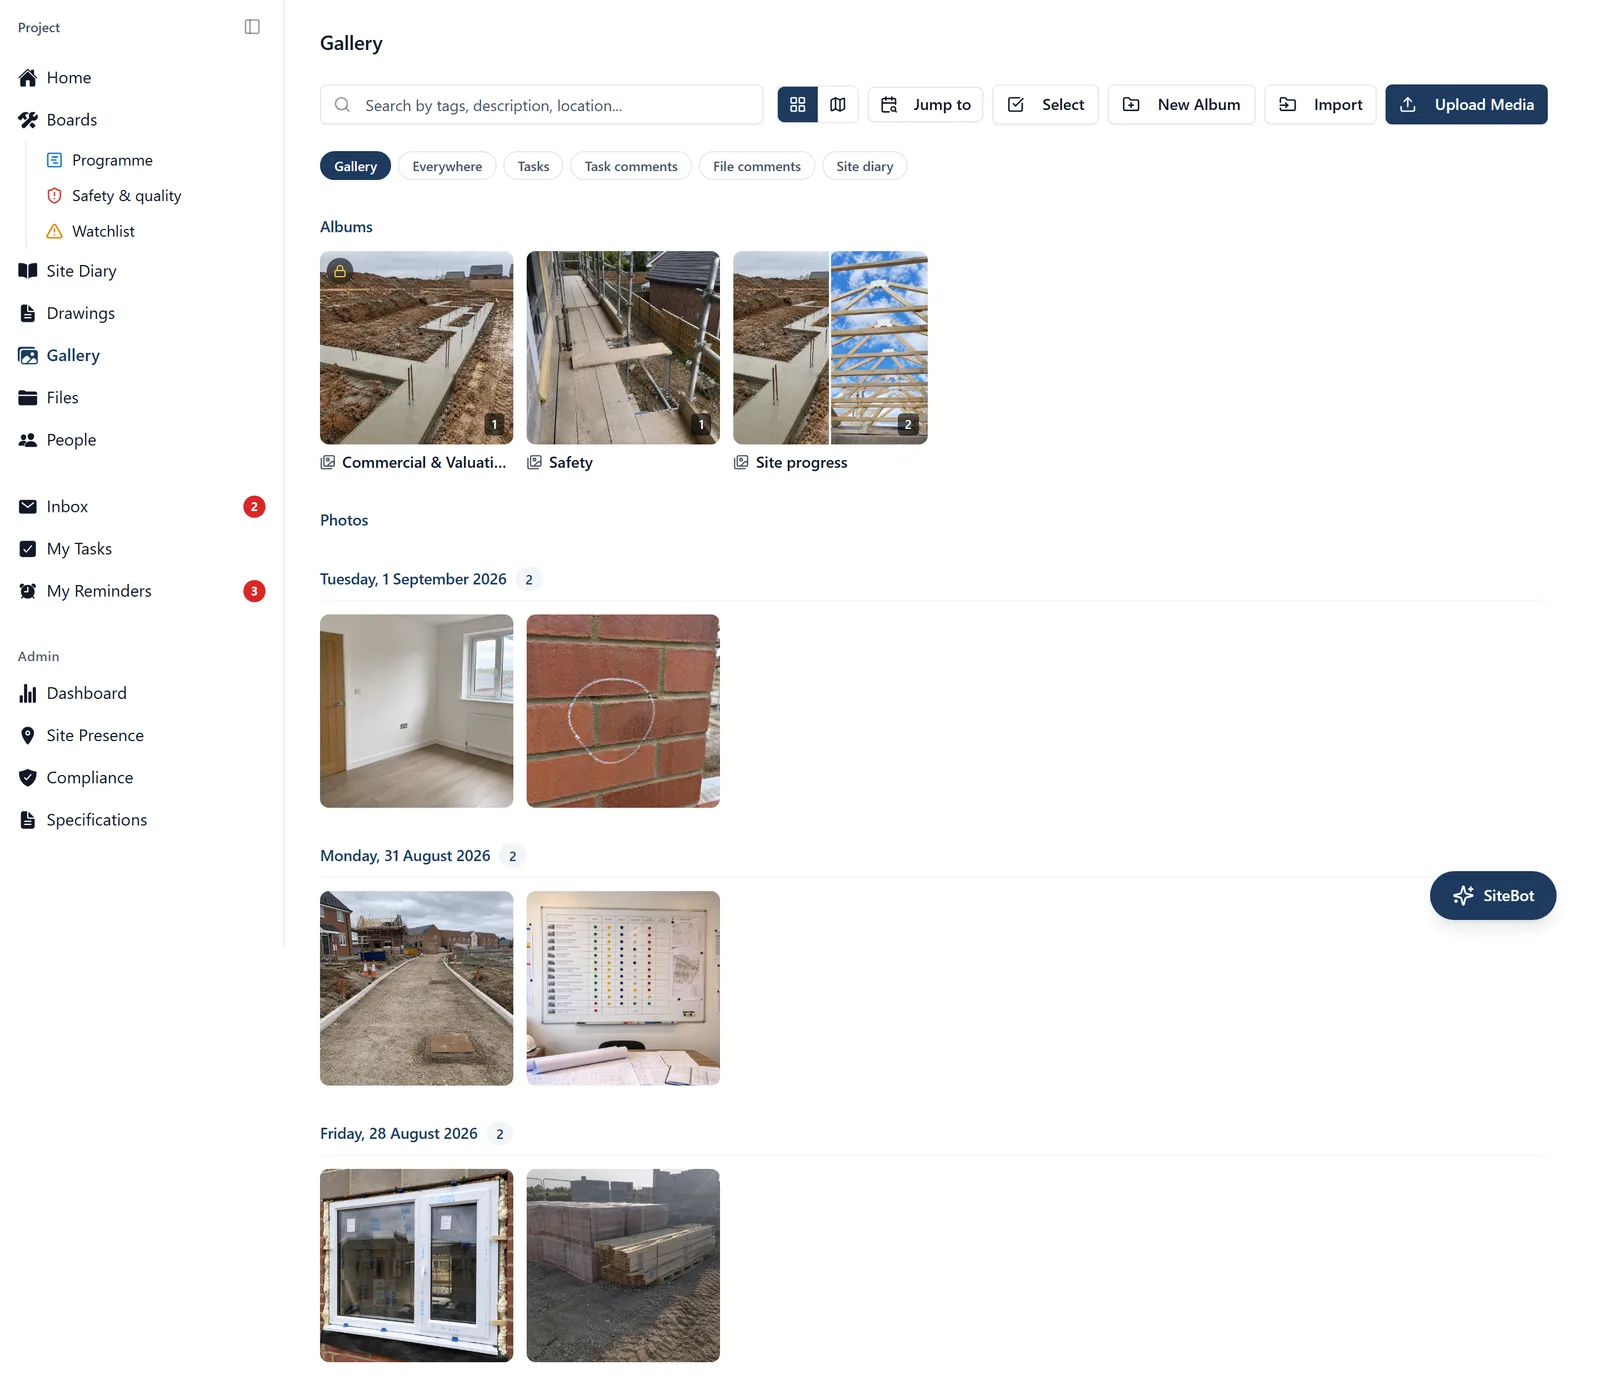
Take site photos and find them easily using AI-powered search. This topic covers getting photographs in and finding them again. Albums are in the “photo_albums” topic, and a photo’s title, drawing on it, points of interest, its discussion and evidence packs are in the “photo_annotations” topic.
How to get to Gallery:
- Tap the images icon in the bottom bar (third icon from the left, labelled “Gallery”)
- In a browser, click Gallery in the left-hand sidebar
What the front page of the Gallery shows:
- The front page holds the photos that are not in an album. This is the same on the phone and in the browser
- So the moment somebody files a photo into an album, it leaves the front page. Nothing has been deleted. Open the album from the Albums row above the photos and it is in there. See the “photo_albums” topic
- In a browser, a project whose photos have all been filed says so on that page: “No unfiled photos. New uploads land here.”
- The search box on the front page only searches the photos on that page, so it will not find one that has been filed. Open the album and search inside it
- Or just ask me: “Find the photos of the cracked lintel”. I look through the project’s photos whether they are filed or not, so I will find it wherever it has been put
Adding a photo or video on the phone:
- Tap the Gallery icon in the bottom bar
- Tap the round + button in the bottom-right corner
- The menu offers Search, New album (admins only), “Add Media” and “Take photo”. Take photo opens the camera inside the app: take a run of shots, then tap “Use” and the number. It records when, where and on which phone each was taken (see “photo_annotations”). No “Take photo”? Update the app. For anything else tap “Add Media”
- It asks “Where do you want to upload from?” Choose:
- “Record video”: opens your phone camera to record a video. Where the app has no “Take photo” this is “Camera”, which takes photos too
- “Gallery”: pick photos or videos already on your phone
- “Files”: pick photos or videos from the files on your phone
- The photo is saved to the project and AI automatically generates tags and a description. A video is saved the same way, but it does not get AI tags or a description
- On an Android phone, choose “Files” when it matters where a photo was taken. The picker “Gallery” opens is Android’s own, and Android removes a photo’s location before handing it to any app. “Files” hands over the photo as it was taken, and the menu says so. The first time, Android asks whether BuildersAI may access photos and videos: allowing it, even limited access, is what lets the location come with the photo. Refuse, and the photo still arrives, without a location
- On an iPhone, “Gallery” keeps a photo’s location, so there is nothing to choose between
Importing a folder of photos (web app): In the browser, two of the buttons above the photos add media. Upload Media is the everyday one: drag photos or videos in, or click to browse for them. Import is the one for a batch off a camera or a phone’s photo roll, and it reads every file before it uploads any of them so you can see what you are about to add. Images only (JPG, PNG, WebP, HEIC or HEIF), no videos. Admins and members only.
- Open the Gallery and click Import
- Click the box and pick the folder, or drag the photos themselves in
- It reads them first and says “Reading photo data…”. Nothing has been uploaded yet
- Then it tells you what it found: how many photos, how many carry a location, how many do not, how many have no capture date, how many could not be read, and how many were taken far from site, meaning more than 2 km away. A photo that could not be read is dated the day it is uploaded, and its row says so, so you know which file to go back for. WebP files always count there, as their data is not read. The far from site count only appears if the project’s own location is set in Project Settings
- A map shows where the first photo carrying a location was taken, so you can tell at a glance whether the folder is even from this site. The list underneath is grouped by the day each photo says it was taken
- To keep a photo but not its location, click the coordinates on its row: they cross out and it is stored with no location at all. Click again to keep it. The x at the end of a row takes that file out of the import
- Click Import. If any of them fail, the box stays open with the list still in it and says what went wrong, so pressing Import again is a retry rather than starting over
- Importing while you are inside an album files them into that album
- iPhone (HEIC) photos keep their location and capture date through Import and Upload Media alike
- A photo’s own location is read from the file as it arrives, because what the project keeps is a converted copy. A photo that arrives without one cannot be given one afterwards. Its date you can still correct by hand, as below
Finding a photo:
- Use the search bar at the top of the Gallery screen
- Type what you’re looking for, e.g., “scaffolding”, “crack in wall”, “brickwork”
- On the phone and in a browser alike it reads the file name, the title and the note somebody typed, the description the app worked out, the tags people added and the ones the app worked out, and the place. So a photo titled “Cracked lintel, Plot 4” turns up when you search “plot 4”. It matches part of a word too, so “plot 4” also finds Plot 41
- The AI tags make it possible to search by what’s in the photo, not just the date
- You can also ask me: “Find photos of the roof” or “Show me photos from last week”
- Cannot remember which job it was on? Open All projects (the BuildersAI logo, top-left in a browser; on the phone, administrators only), then Photos. That searches every project you are on, archived ones included, and a tile opens the photo. See the “all_projects” topic
Seeing every image on the project, not just Gallery ones: Pictures also arrive on tasks, in comments and in the site diary. A row of six chips above the photos widens what you are looking at:
- Gallery: photos uploaded to the Gallery, and where the browser starts
- Everywhere: every image on the project, every source at once
- Tasks: images attached to a task
- Task comments: images somebody put in a comment on a task
- File comments: images somebody put in a comment on another file
- Site diary: images added to a day in the site diary Worth knowing:
- A tile that did not come from the Gallery carries a small label saying where it did, such as “Task #12”. Open it and the Info tab names the place in full and links to it
- Which chip you are on is part of the page address, so a link you send or a bookmark you keep opens on the same chip
- On the other chips the search box looks through everything in that source, not only the tiles already on screen
- On any chip but Gallery, the albums and the Jump to button are hidden. Both belong to Gallery photos
- An image on a task or a comment has no capture date of its own, so its Info panel says Added rather than Captured
- Those images cannot be dated, filed into an album or deleted from this screen, and the screen tells you so if you select one. Open it and deal with it where it lives
- The phone shows every image too, starting on Everywhere. Its chips appear only where there is more than one source, and it has no Site diary chip: the diary is not kept on phones
Viewing a photo:
- Tap any photo thumbnail to see it full-screen, and pinch to zoom
- On the phone a picture on a task, or in its comments, opens the same way from the task, and swipes through the rest of them
- On the phone, the strip under the photo shows its title, the date, a line of the description and its tags. Tap that strip to open Photo Info, which holds the full title and description, the date it was captured and, separately, the date it was uploaded, the location on a map with a link to open it in Maps, the AI description and the tags
- On the web app the description sits in a box under the photo. Everything else is on an Info tab beside the image, and on a narrow screen behind the Info button at the top of the viewer. The web panel also says where the image is used, and names the file, its size and its type
- Who uploaded it is not in that panel. On the web app it is the first line of the Discussion tab beside the photo. See the “photo_annotations” topic
Two dates, and where the location came from:
- Captured is when the picture was taken and Uploaded is when it reached the project, and the panel shows both on either platform. On a site with no signal a photo is often taken on the Friday and uploaded on the Monday, and a record that runs the two together is worth nothing in an argument
- Under the coordinates the panel says where that location came from, in one of two lines. “Recorded by this device at the time” means the phone took the picture and read its own position. “From this photo’s own data” means the position was read out of the file the photo arrived in
- If we do not know, it says nothing at all rather than guessing. Photos taken before the app started recording this carry no line, and that is deliberate
- The circle drawn around the pin on the small map is how accurate the fix was, so a wide circle means a rough position. The phone prints the same thing beside the coordinates, as “±20m” or similar
- Open in Google Maps in the browser, Open in Maps on the phone, takes you to the spot
Taking a copy of a photo away (browser):
- Download and Share are the two icons in the top bar of the photo viewer
- It asks what the copy should carry. Include the annotations, drawn onto it for whoever is fixing the snag, offered when there is something drawn. Stamp the date on the image, printed into the corner for anyone who has to read the date off the photograph
- Both answers are remembered, so a set for an inspection is one decision, not forty. Your photograph in BuildersAI is never changed either way: only the copy going out carries anything
- The annotations question has nothing to do with whether the eye icon is showing them
- The date stamp in full, what the drawings and pins are, and how to hand over a whole set with their dates written down, are in the “photo_annotations” topic
Selecting several photos at once:
- A whole day in one go: every day’s heading has Select at its right-hand end (in the browser it appears when you point at the heading). Once you are selecting, it reads Select all or Deselect all for that day, so you can take several days or put one back. With a search typed in, it takes that day’s matching photos
- In the browser the Gallery loads 200 photos at a time, so the oldest day on the page is often cut off. Selecting it loads the rest of that day first
- One at a time: on the phone, press and hold a photo (if you can set who sees photos, tap “Select photos” in the menu). In the browser, click Select above the photos, then click the ones you want. Shift-click takes a whole run
- The count shows at the top, “12 selected”. On the phone the X clears it. In the browser the x beside the count clears it, and Cancel stops selecting
- On the phone the buttons are Attach to task (the paperclip), Add to album (admins), Share, and More: change the date, set who can see them (admins), delete
- In the browser: Add to album and Set access (admins), Attach to task, Evidence pack, Edit Date and Delete
- Albums are in the “photo_albums” topic, Evidence pack in “photo_annotations”
Attaching photos to a task:
- Select them, a day at a time if you like, and tap or click Attach to task
- Pick the task. Open work comes first, newest first, then finished work, since photographing a snag once it is fixed is the usual case. Search by title or number, “#42”
- In the browser click Attach. On the phone tapping the task attaches straight away
- The photos stay in the Gallery and also show on the task with its attachments. One already on that task is not added twice, and the app says how many were
- Admins and members only. On the phone it works without signal
- Images on the browser’s other chips (tasks, comments, diary) cannot be attached from here
Sending a day of photos to someone: on the phone, select them and tap Share: each goes as a JPEG with its capture date and location in it. In the browser, use Evidence pack, a ZIP with a spreadsheet of when and where each was taken
Videos:
- The Gallery handles videos as well as photos. Tap any video thumbnail to play it.
Editing the date or time of a photo or video:
- On the phone, open the item and tap the date below it to edit
- In the browser, hover over the photo in the grid and click the calendar icon
- Or select several items first, then use the buttons that appear to change the date on all of them at once
Map view:
- Tap the map icon at the top of the Gallery to pin every photo that has a location, albums included. Tap a pin to open what was taken there. Inside an album it maps that album
Jumping to a date (web app): The Gallery loads newest first, so reaching June on a job that started in January meant pressing “Load more” over and over.
- Click Jump to, the small calendar button beside the grid and map buttons
- Use the arrows to reach the month you want
- Click the day. The app loads its way back to it and scrolls straight there
- A day with no photos is greyed out and cannot be clicked, so every day you can pick lands on something. Hover a day to see how many photos it holds
- In a project it is offered on the grid only, not the map, and only on the Gallery chip. Inside an album it counts that album’s photos
- The same button is on the Photos tab of the All projects screen
Mobile-only handy tricks:
- Share as JPEG: when you share a photo from the mobile app, it’s converted to a standard JPEG so it works in any messaging app
- HEIC photos from iPhone are converted automatically. You don’t have to do anything
Offline:
- Photos you take without internet are saved on your phone and uploaded automatically when you’re back online
- AI tagging happens after the photo is uploaded
Photos that have not finished uploading:
- While photos are going up, a line appears at the bottom of the phone screen, just above the icons: “3 files still uploading”. It clears itself when they are done
- If any of them failed, it says “3 files did not upload” instead and offers Retry. Tap it
- With no signal you will see neither. The offline message takes that spot, and retrying with no connection could not work anyway
- The app keeps trying on its own, but only while it is open. If photos are sitting in the queue, open BuildersAI on the phone that took them and leave it open somewhere with a signal
- In the browser, a photo that has not arrived yet shows as an empty tile with a small crossed-out cloud in the bottom-right corner. Open it and it says Upload pending, and to open the BuildersAI app on the device that took it
- Until it arrives there is nothing to send, so Download and Share are greyed out on that photo
Who can do what:
- Admins and members can add photos and videos, change a photo’s date, delete a photo, and attach photos to a task
- Only admins can set who can see a photo, or file photos into an album. See the “photo_albums” topic
- A follower cannot add or change anything in the Gallery, and sees only the photos and albums set to “Everyone”
- If the project’s subscription has lapsed the whole Gallery goes read-only for everybody. In the browser a line under the heading says so: “Photo management is disabled. The project subscription is inactive.” On the phone you are told when you try to add something: “This project is locked”